One of the major advantages of WordPress is how easy it is to use. And trust me—I know it looks a little daunting at first. But it is, in fact, easy to use. There’s even a lot hiding under the hood that can make an already simple platform even easier.
I’ve published thousands of WordPress pages and posts across dozens of sites. When publishing that kind of volume, you have to be aware of what you’re doing. Here’s the most helpful tips about editing WordPress sites I’ve learned during my journey.
The Basics of Editing in WordPress
WordPress is a simple system. First, it separates your content into two types: pages and posts. Pages are for static information about your site, such as your company’s story. Posts are for more ephemeral and dynamic content, like blog articles.
Whether you’re editing a page or a post, you’ll use the block editor. The block editor separates your content into sections, such as a paragraph of text, an image, a heading, and then another paragraph of text.
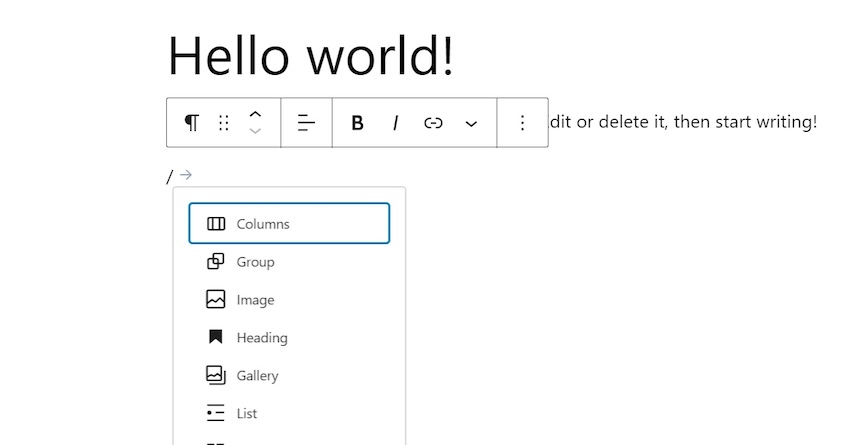
The Block Editor of WordPress is also what’s known as a WYSIWYG editor: “What You See is What You Get.” The great thing about a WYSIWYG editor is that you don’t need to know any code to use it. You just have to use the visual editor to format your text—a lot like using Microsoft Word or Google Docs.
But the easiest way to learn WordPress is to work directly in it. Over time, you’ll learn more tips and tricks and editing will become second nature.
WordPress has had years to develop an intuitive user interface, and you’ll start getting a feel for the platform quite quickly. Feel free to experiment. WordPress will save copies of your draft so you can always undo your latest changes. You also always have the option to press the Preview button to view your changes in place.
You can start by finding the right WordPress host for you.
Full Site Editing and the WordPress Site Editor
Apart from editing pages and posts, you can also edit the appearance of your site using the Site Editor. Not all themes support the WordPress site editor. But those that do will let you edit the look and feel of your WordPress site, similar to how you can edit pages and posts.
To customize your entire site, you should look for a theme that supports Full Site Editing. You can find these themes by applying a filter in the WordPress theme archive.
Elementor, WPBakery, Divi, and Similar
But let’s say you’re editing your website, and it looks a little different. Or, possibly, way different. And all you’ve done thus far is apply a theme.
Not every WordPress site uses WordPress’s default block editor. Today, quite a few themes use plugins like Elementor or WPBakery. This dramatically changes the steps that you’ll take to edit your site.
What you need to know:
- If your theme uses Elementor or WPBakery, you can’t switch between that system and the built-in WordPress block editor. You’ll need to choose one and stick to it.
- Theme editors like Elementor can do some amazing tricks because they have pre-built components, but you’ll have to learn how to use them.
- Theme editors like Elementor are also quite popular, so it’s easy to stumble upon a theme that uses them completely accidentally.
11 Useful Editing Tricks for WordPress Sites
Now that we’ve covered the basics, let’s dive into some of the most important tricks that have saved me time and frustration over the years.
1. Bulk Edit
Sometimes, you have to change a lot of content at once. Here’s an example: You might need to change the author of all your pages quickly. Bulk editing lets you update certain post and page features for multiple posts and pages.
Go to the top left dropdown box and select Edit. Check the checkbox to the left of every content piece (page or post) you want to edit, then hit Apply.
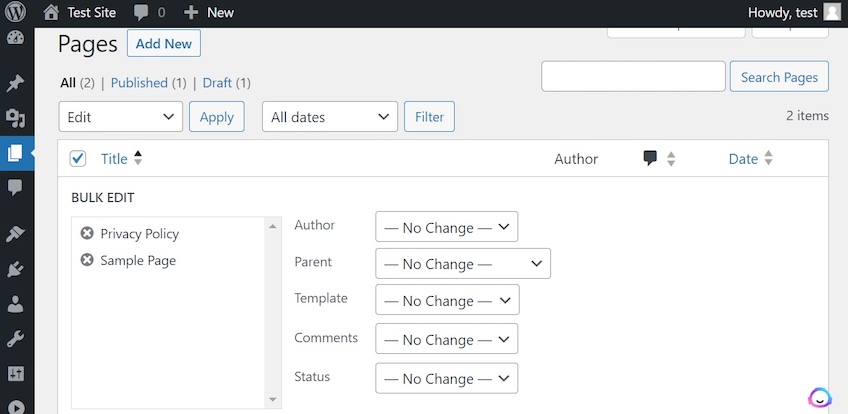
Use Bulk Edit to change certain aspects of your pages and posts quickly, such as the template that a post uses. But be aware that you’re changing a lot of content at once. When you press the Update button, all your content will be updated!
2. Copy Pages and Posts
You’ve been working on a page or a post for a long time. It’s finally exactly how you want it. Rather than trying to do it all over, consider copying the page or post. Copying a page or a post (rather than making a new one) lets you retain all that formatting and structure work you did.
But there’s a catch. The easiest way to do this is actually through a plugin: Duplicate Posts.
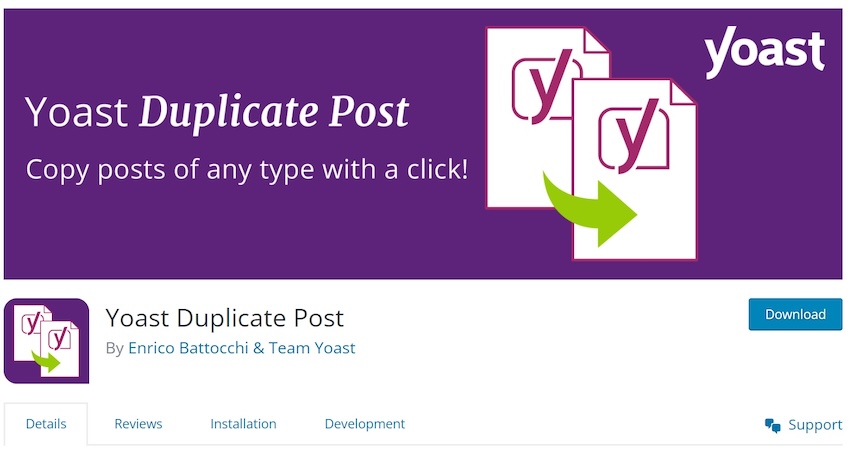
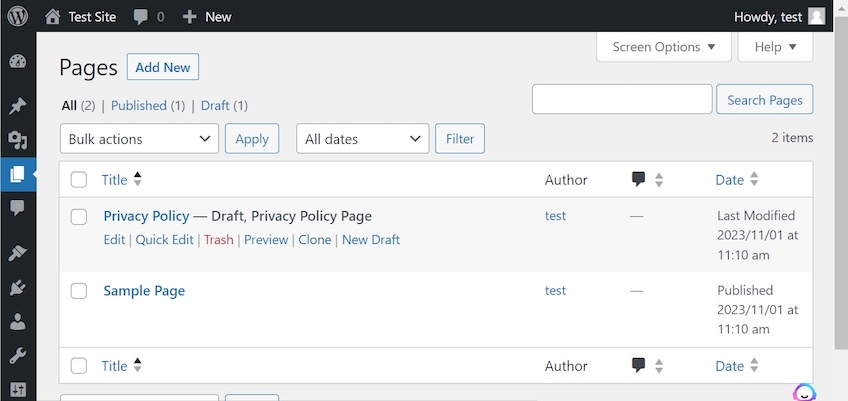
Once you’ve installed this plugin, a “Clone” option will appear next to each of your posts and pages. You can press Clone to create a new copy.
3. Use the Quick Edit Bar
Similar to Bulk Edit, Quick Edit shows up on your list of pages and posts. Quick Edit lets you edit aspects of your content without leaving your content list. So, from the Posts or Pages listing, you can quickly edit multiple pieces of content.
Under a post or page, select Quick Edit.
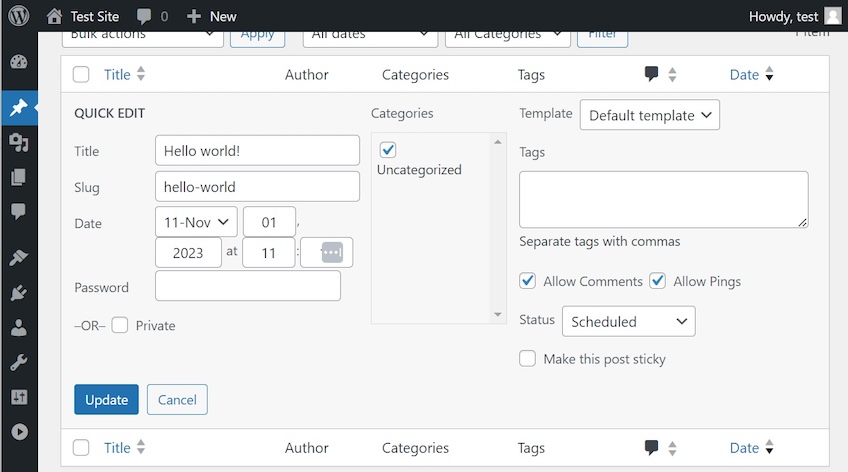
Here, you can see that you can quickly edit the title, slug, date, template, or tags of a post. You can also change settings, such as whether it’s currently published, whether it’s private, and whether you want to allow comments or pings.
4. Use Shortcuts
If you’ve used Microsoft Excel for a long time, you know the magic of shortcuts: quick sequences of keyboard presses you can use to streamline your operations. WordPress comes with some useful shortcuts, too. It’s worth it to learn to use these shortcuts if you want to edit your content quickly.
In addition to the old standbys (CTRL+C for copy, CTRL+V for paste, CTRL+X for cut), WordPress shortcuts include:
- Type / to quickly pull up the block selection. You can then use your arrow keys to navigate up and down and hit enter to select the right block.
- CTRL+K allows you to insert a link (anchor) on the selected text. You can copy and paste a URL or search content already on your site.
- CTRL+S is an easy way to save your changes. WordPress will save automatically at intervals, but you can use this if you want to save your data manually.
- And with CTRL + SHIFT + D, you can duplicate a block. If you have a block of content you want to copy (such as a paragraph, heading, or image), use this to copy it.
5. Styles
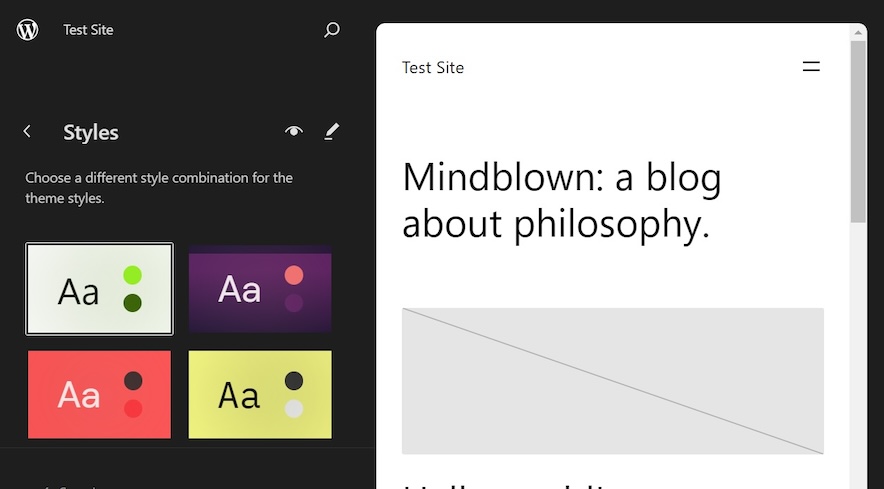
The Styles setting of your WordPress site helps you create a consistent look for your site. You can set Typography, Color, Layout, and Block options across your site by selecting a given style.
Go to Editor and then Styles to see a selection of pre-built styles for your site. Using Styles is much faster than trying to manually edit your color and typography combinations.
6. Templates
In addition to Styles, you can also build Templates around your content. Templates give you pre-built structures for your pages, such as which header and footer to use. You can find Templates in the same area as Styles by going to Appearance, Editor, and then Templates.

Use Templates to control how pages like your Blog archive look.
7. Block Patterns
With the right theme, you can also use Block Patterns. A Block Pattern is a pre-built block that has an advanced, preformatted design. A great example is a gallery of images.
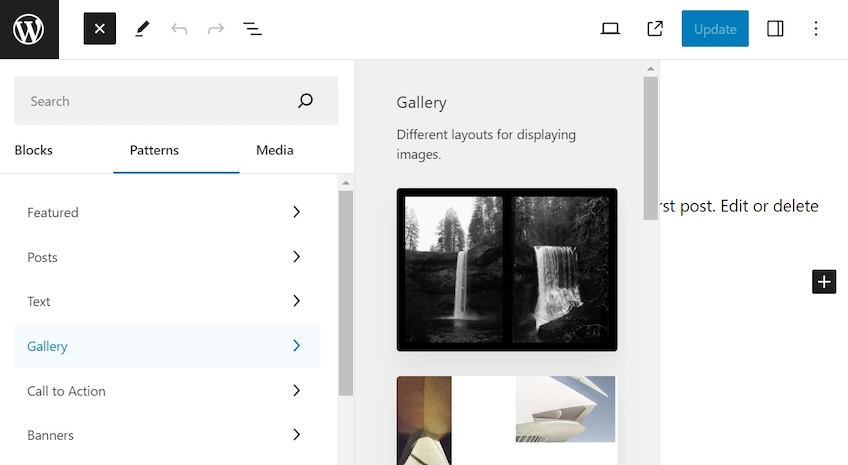
To look at a Pattern, add a Block to your post or page and then select All Blocks. From there, you’ll see tabs that read Blocks, Patterns, and Media. Select Patterns, and you can browse all the different options.
8. Typography Settings
What makes a site look consistent? Websites, like magazines and other print publications, rely on typography to define their style. The typography of your website is how the text looks: What size are the headers? What font does your content use?
You can access your typography settings through Appearance, Editor, and Styles. Once you reach the Style editor, you can then select Typography.
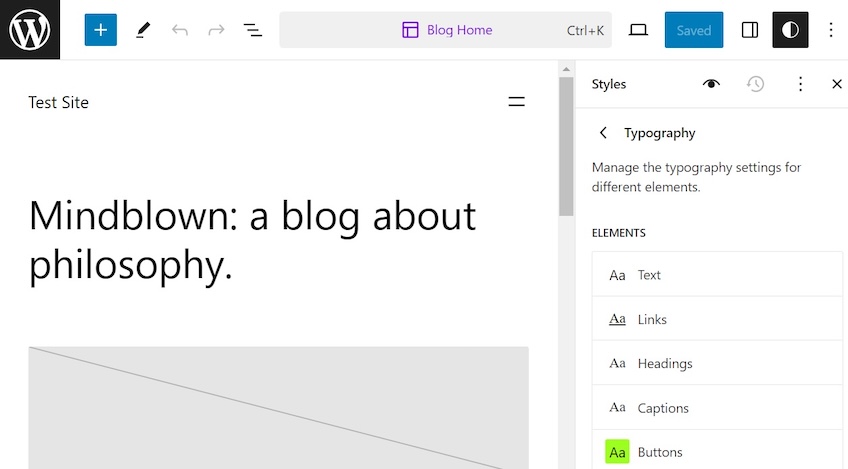
Typography will let you control elements such as text, links, headings, captions, and buttons from a single area so you can quickly customize the appearance of your site.
9. Image Editing
WordPress actually has a fairly advanced built-in image editor that lets you edit images in place. Select your image block and you’ll see options such as Duotone.
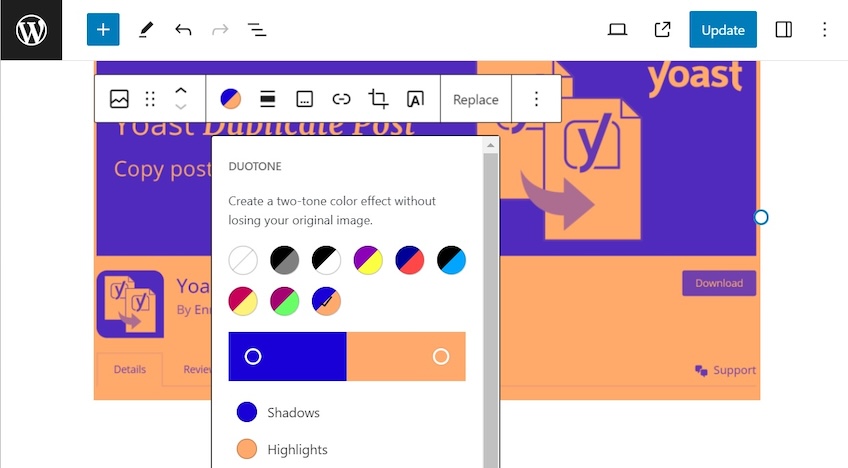
Here, you can also crop an image or rotate it. Duotone, in particular, makes it easy to create images that match your site’s theme colors—without having to open a separate image editor. You can also add a caption or add text over the image.
10. Content Previews
Before you publish a post, you can Preview it. The Preview option is at the top right bar of every post and page. When you select it, you can select Desktop, Tablet, or Mobile.
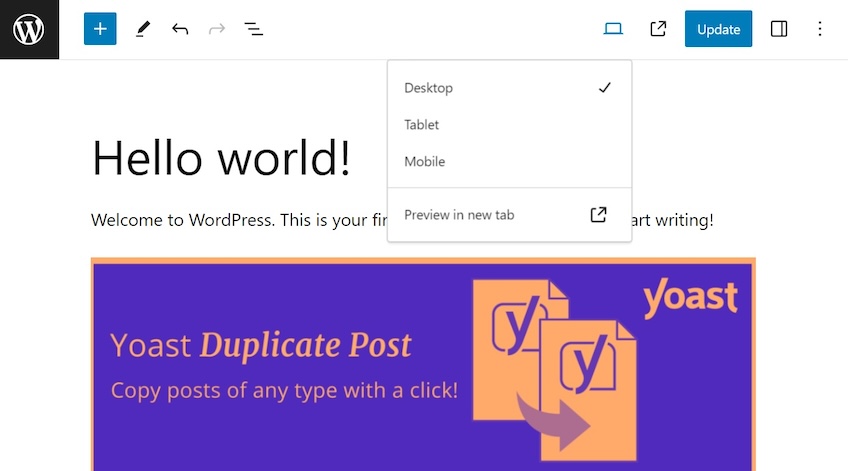
Previewing your content lets you very quickly see how it’ll look in desktop, tablet, or mobile—so you can make adjustments without having to load your website on these devices.
11. Theme Filtering
Finally, a lot of the features that you have available to you rely on the themes you select. So if you really want to edit your WordPress site with ease, select the right theme to begin with.
When you go to Appearance -> Themes -> Add New, you’re given an option of some of the most popular WordPress themes. Click on Feature Filter and scroll down.
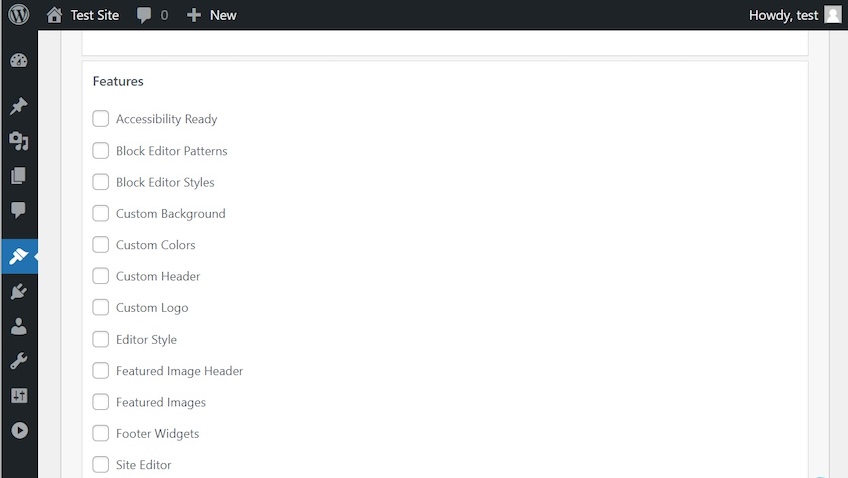
Here, you’ll see important options such as:
- Block Editor Patterns
- Block Editor Styles
- Site Editor
If you want to use these features, search for a theme that will support them.
Happy Editing!
You’re ready to start editing your first WordPress site. So, what’s holding you back?
If all of this seems too complicated, don’t worry. One of the major reasons people use WordPress is because of how simple it truly is. You don’t need to use any of the above tricks to create a great-looking website or blog in WordPress. It just makes it easier.
Follow our guides to find out more about creating WordPress sites and using the WordPress editor.
