Creating a website used to be a massive project. Expensive, too.
Businesses needed to work with an online marketing agency that would charge them tens of thousands of dollars to build the site. If you wanted a professional-looking site, that was your only option.
Things have gotten a lot cheaper and easier. The most popular option— which only costs a few bucks a month to start— is creating a website with WordPress.
There are a number of approaches you can take to creating a website, but more on that later. Let’s dive right in.
9 Steps to Create a Website With WordPress
These are the nine simple steps to create a website from scratch with WordPress:
- Pick a name and find a domain for your website
- Register your domain name
- Decide what kind of site you are creating
- Get a host for your website
- Install WordPress
- Point your domain to your host
- Install a WordPress theme
- Add content to your website
- Continue evolving your website
You’ll easily be able to run through these steps over the next 120 minutes.
Step 1: Pick a name and find a domain for your website
Time for a tough truth: A lot of the good domain names have been taken.
Here’s how a naming session might go for you:
- In a moment of inspiration, we think of an amazing name.
- We hold on to this name for months, maybe even years.
- It’s time to start the business, so we go to purchase the domain.
- The domain is taken.
- We try a dozen small variations of our original idea, all taken.
- No biggie, we thought of one brilliant name, we’ll think of another one.
- Backup idea #2 = taken.
- Backup idea #3 = taken.
- Backup idea #4 = taken.
- Despair sets in.
- We start considering names that we don’t actually like, hoping that anything is available.
- We come up with 2 or 3 options that we don’t like at all.
- Then we spend a week trying to come up with a name that’s both available and a name that we can live with.
- Finally, we find one.
Websites have also become so embedded in our day-to-day lives that it’s better to change the name of the business to match an available domain than it is to pick a poor-quality domain. Through this process, I almost always end up with a completely different name than I originally intended.
This is why I consider the “naming my business” and “buying the domain” steps for creating a business to be the same step. I try to only lock myself into a name once I have the domain.
We put together an in-depth guide on buying domains here.
The good news is that the rest of these steps are a breeze once you have your domain purchased. It’s the first and hardest step to create your website.
Step 2: Register your domain name
First you need to know the difference between a domain registrar and a web host.
A domain registrar is a company that specializes in buying and registering domains.
A web host, on the other hand, specializes in running servers that host websites. This is where your website “lives.”
Every web host will desperately try to get you to also register a domain through them. After all, it’s more money for them. They’ve spent most of their resources building out a hosting service, then they offer domain registration as a convenience, increase the price a bit, and collect a nice chunk of extra profit from you.
My philosophy is to buy things from businesses that specialize in that exact thing. Prices will be better and so will quality. That’s why I also use a domain registrar for buying domains and a web host for hosting. I never mix up the two.
The best domain registrar is Domain.com. That’s where I have all of my domain names.
We put together a detailed review of domain registrars here.
Step 3: Decide what kind of site you are creating
Most guides on creating a website will push you into using WordPress. It’s the most popular and flexible website builder. And that’s usually a good recommendation.
But there are a few situations where I recommend different options.
Simple Portfolio or “Business Card” Sites
Many businesses need a simple website that tells people a few things:
- Who the business is for
- What the business does
- Sometimes a portfolio that shows off some work
- Contact info
You need to communicate basic info—and that’s all. If this is what you need, Wix is your best option for creating your website. It’s incredibly simple to use and will give you a professional site at a very low price. It’s perfect for small businesses.
They’ve created the simplest and easiest website builder out there. Truly, it’s a joy to use, and makes the most sense when you just need a clean, professional-looking site that gives some basic info on your business. It’s perfect for small businesses, freelancers, and artists.
Ecommerce Sites
If you’re planning on building an ecommerce store for your site, don’t use WordPress. We have an entire post here on when to use WordPress for ecommerce and when not to. The short story: it rarely makes sense to use WordPress for ecommerce.
You can if you really want to but it’s not really the most optimal way to do so.
The best option, by far, is Wix again. There used to be more competition in the ecommerce tool space, but Wix got too far ahead of even Shopify.
If you’re going this route, we have a 9-step guide on how to create an ecommerce website. We also have a guide on how to start a store that drives real sales. Both of those guides will get you pointed in the right direction.
Blog Sites
If you know you want a blog or are planning on doing lots of content, start on WordPress. The majority of this guide is around building a WordPress website. (We also have a detailed guide on starting blogs here.)
Most websites are really just blogs. Some of the biggest, and most well-known websites on the Internet are blogs. WordPress powers over 30% of the entire internet. So it’s the only real option for starting a blog these days.
What about Joomla or Drupal? Or Typepad?
WordPress left all those other platforms in the dust about a decade ago. They’re not even legitimate options at this point. Pick WordPress — there isn’t a single situation where you’ll regret it.
When I originally started with this online thing, Drupal sites were still pretty common. I partnered up with an engineer friend of mine and we did a lot of freelance work migrating sites from Drupal to WordPress. Even back then, WordPress was a clear winner.
Now when I come across a site on any of these other tools, it’s kind of exciting. It’s like finding an ancient artifact. “This still exists!? How fascinating!”
Don’t use any of these other tools, stick to WordPress.
Everything Else
If you’re not sure or have another vision for your site outside the categories above, use WordPress. It’s one of the most flexible platform out there. It will do ecommerce, it’ll do simple portfolios, it’ll do massive content sites, it’ll do Fortune 500 marketing sites, it’ll do it all.
You might have to customize it more than other platforms in some situations but you can make WordPress do whatever you want it to. And just about anyone in online marketing knows their way around WordPress so you’ll be able to find plenty of people to help you when the time comes.
Whether you want to build your site by hand or you have an online marketing agency to do it for you, you should still build on top of WordPress. It’ll shortcut programming work and let you edit basic items on your site without having to edit code. I’ve managed marketing sites of venture-backed tech startups that employed dozens of engineers — we still had our marketing site built on top of WordPress. It’s the standard choice.
Step 4: Get a host for your website
Now it’s time to get into the weeds a bit. The next steps really depends on your actual goals.
If you want an ecommerce site, skip the rest of this guide and follow our guide on creating an ecommerce site.
For everything else, keep following this guide!
So WordPress is the tool that you’ll use to build your website. But you also need a web host. That’s the actual server that will store your site and make it available to anyone who visits.
Every website on the internet has a web host provider. And the best place to go for most people is Hostinger, a reliable and high-quality hosting service.
You can also check out our guide that goes through all the best web hosts to compare providers.
If you want Hostinger’s Managed WordPress hosting, pricing starts at only $1.99 for a single website and all Hostinger plans come with a 30-day money-back guarantee.
Step 5: Install WordPress
Hostinger offers a great one-click installation feature for WordPress.
The benefit is it’s incredibly simple to integrate the web host with WordPress. It should be clearly available when you log into your Hostinger account.
Step 6: Point your domain to your host
Let’s do a quick recap.
- You bought your domain using a domain registrar.
- You signed up for a hosting plan.
- You installed WordPress on your host.
Now you’re going to connect all that stuff together by pointing your domain to your host. Then when people go to your domain, they’ll end up on your website.
There are a few technical settings you need to apply. This involves configuring a few nameserver settings on your domain registrar for your domain. Your host will give you the correct settings; you’re looking for their nameserver settings.
If you’re confused, just reach out to a customer service rep from the host and they’ll help you out.
Once you have the nameserver info from your host, go into your domain registrar and configure those settings for the domain that you want to point at your site.
Step 7: Install a WordPress theme
WordPress is the heart of your website. It keeps your website alive and running. Treat it well and it will treat your business well.
WordPress uses themes to determine how your website looks. This makes it really easy to change how your site looks without having to rebuild your site from scratch. Swap out your old theme for a new one and ta-da! Your design will look completely different.
These days, I purchase all my themes from StudioPress.
Heads up, WP Engine bought StudioPress and now includes all the StudioPress themes in its hosting plans. WP Engine is more expensive but it’s perfect for serious bloggers. It’s a great way to save money on your theme if you are planning on building a large site to begin with.
WP Engine is another one of our recommended hosts if you’re looking for the best. The downside is that WP Engine tends to be more expensive than other hosts. It’s probably overkill if you are just starting out, or creating your first website.
Back to themes, are there other options?
You betcha. ThemeForest and Pixelgrade has a marketplace of WordPress themes. There are literally tens of thousands of themes to pick from. They’re usually in the $30–60 price range. When looking for theme, I rank them by the most popular or the highest rating. Then I pick one I personally like.
After you’ve purchased a theme, go to the WordPress Theme settings and upload your theme. The Theme settings are under Appearance in the WordPress sidebar menu. You’ll have to click through “Add new” and “Upload Theme” in order to see this option to upload:
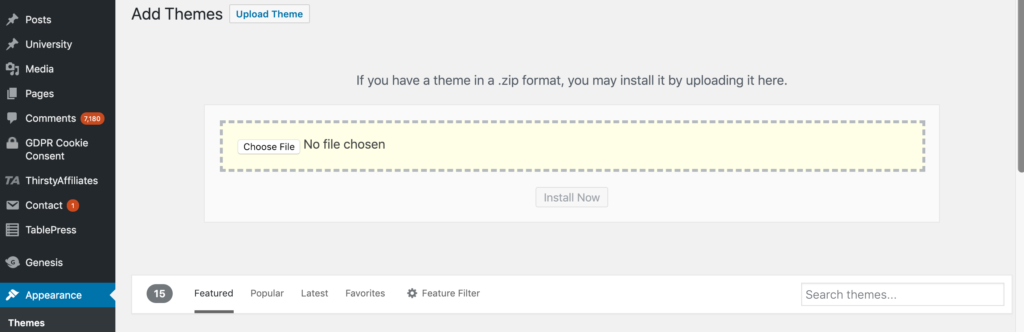
Go ahead and upload the .zip file you received when you purchased your theme.
After it’s uploaded, you’ll also have to click “activate” on the theme in WordPress to make it go live.
Step 8: Add content to your website
Now it’s time to create individual pages for your site.
You’ll do this within WordPress.
WordPress has two types of content: pages and posts.
Think of posts as blog posts that are published under a “blog” section of a site. If you’re not planning on having a blog, then you can skip posts entirely.
Pages are the more permanent pages on your website. Like your About or Contact Us pages. When you’re first creating your website, you want to get a batch of pages live so your site feels real.
Every website has a few standard pages you should create:
- Homepage – Your WordPress theme usually has settings for this page.
- Contact Page – Create a new page and install a WordPress form plugin so you can add a form to the page.
- About page – Tell your story and why you’ve started your business.
- Product or services pages – For the main services or products that you’re offering, it’s a good idea to create a dedicated page for each.
- Blog – If you’re building a blog, make sure all your posts get listed here.
This list will get you started. You can always add more later.
Step 9: Continue evolving your website
You now have a beautiful, fully functioning site.
But there’s a lot of extra configuration you can do to your site: add WordPress plugins that upgrade your site, build out a blog, add an email list, grow traffic, the list is endless.
You don’t have to do any of this extra stuff. It depends on your priorities and goals.
A website is an ever-evolving thing. The way it looks after you first create it, won’t be how it looks a couple of months later. At least that is the case if you are actively working and growing your website.
When you’re ready, these guides will walk you through the extra stuff that’s worth considering:
- Want to improve SEO? Check out The Best SEO Plugins for WordPress and 5 Easy Steps to Creating a Sitemap For a Website
- Want to get more readers? See Brand New Blog. No Traffic. Here’s What to Do. and The Best Email Marketing Services
Our General Take On Building a Website
Don’t get confused by all of the different options for creating a website.
For a more in-depth look at how we think about this, check out our preliminary guide on how to create a website.
WordPress is King
Again, I highly recommend building your website with WordPress— especially if you’re making a blog or a business site.
Some of the biggest websites on the Internet are built on WordPress. TechCrunch, The New Yorker, Variety, and MTV News, just to name a few. There’s a reason for that: They’re the best CMS out there — bar none.
It’s an open-source platform that allows you to run your website with very little technical expertise. It’s also the most popular blogging platform, so there are hundreds of thousands of smaller websites that use WordPress.
WordPress is used by 33.4% of all the websites and has a content management system market share of 60.3%.
Much of our content is centered around WordPress because we use it for all of our websites outside of Ecommerce.
Here’s the guide on how to create your website on WordPress.
Wix for Ecommerce
For Ecommerce, we like Wix — which is an Ecommerce website builder that allows you to get an online store up and running quickly.
The reality is that creating and running an online store can be a huge pain. Wix takes that pain away. That’s probably why they are growing so quickly.
Here’s the guide on how to create your website on Wix.
The Dozens of Other Options
If you’re reading this right now, then you most definitely fall into the category of someone that should be using WordPress or Wix.
In rare cases, it might make sense to create a website using Squarespace or a similar website builder.
In other (very) rare cases, it might make sense to have a custom-built website.
Creating Your Own Website: In Summary
Creating your website might seem overwhelming at first. It really comes down to starting with these simple steps:
- Is your primary purpose to sell things on your website? If yes, then focus on Wix, if no, then focus on WordPress.
- Use the guides on Quick Sprout to help you through the process. It’s a learning curve for sure. Taking the time to set up everything correctly will help you grow your business and your traffic much faster later on.
- Don’t hesitate to reach out to us directly via email with questions. We’ll help however we can.